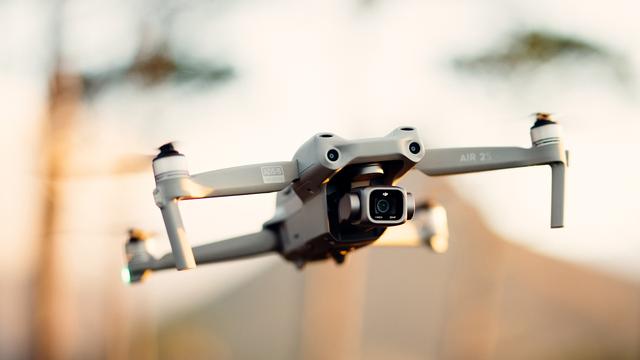
Today's top camera drones are capable of capturing incredible cinematic footage. If you've invested in one of the best drones around – such as the fantastic DJI Air 2S – you'll want to get the very best from it. Beyond your drone's own capabilities, there are some things you can do to improve your aerial video. Read on for our five top tips.
Not kitted out yet? Our best beginner drone guide is full of easy-to-master recommendations for fledgling fliers (current winner: the DJI Mini 2, although the Autel Evo Nano is better if you can afford it). If you're on a tighter budget, our best cheap drone guide contains plenty more wallet-friendly picks (winner: the Ryze Tello).
To kick things off, if want to improve you videography skills, watch this video which pretty much sums up the most spectacular shots you can take from a drone.
We can’t stress this enough. If you dart around the sky veering the craft from one direction to the other, the footage will just look awful. The rule is to keep things moving really slowly and without any sudden changes in direction. Also bear in mind that the lower you fly the greater the sense of motion.
One of the most cinematically impressive drone shots is the classic ‘reveal’. For this you need an attractive focal point like a statue, building, natural feature or even a few people. Fly the drone towards and beyond the focal point, bring it to a halt and set your camera to record. Now fly backwards very slowly keeping the drone near to one side or just above the main object. The result is always spectacular. Alternatively, keep the drone roughly at the same altitude as the object you’re shooting, move it slowly across the frame from behind a tree to reveal the subject, and gently move the left control stick so the drone slightly revolves around object. With some drones you can also select autonomous ’orbit’ mode and have the drone fly in a near-perfect circle around the subject.
The gimbal is an essential device designed to keep the camera its holding steady while the drone is in motion. Without it, the picture will dip and dive as the drone moves forward and backwards. The best gimbals have three mechanical axes that stabilise pitch, roll and yaw. All gimbals can be controlled to move up and down by the pilot on the ground. Set your gimbal to one of the slower settings and take time to practice with it. Good gimbal control is essential to producing fluid footage.

Panning is an art. Stick to the universal ‘seven second’ rule and your footage won’t stutter as it arcs from one side to the other. This means counting seven seconds from the start point of the pan to the end point. That said, panning in a circle from a static position is never advised since it just looks boring as the image swivels from one side to the other. Much better to use the drone to slowly fly from one side of the scene to the other, perhaps while adding a smidgeon of subtle panning in the process. And, once again, keep gimbal and drone movement slow and steady – you can always speed up footage in post production.
In photography, a fast shutter speed is considered a good thing – it produces pin sharp images. However, it has a negative effect with video by giving the impression that the moving image – especially during sideways motion – is stuttering across the screen in tiny staccato movements. To get around this inherent anomaly, always try and set your camera’s shutter speed to twice that of the frame rate. So, if shooting 1080 footage at 50fps, select a shutter speed of 1/100 of a second. And if shooting at 25fps, try 1/50.
The trouble is these settings don’t work well in bright light, which is exactly when you’ll be flying. You’ll notice the video is massively overexposed and almost completely washed out. That’s where the humble but invaluable ND (Neutral Density) filter comes in. This simple screw-on kit is basically a piece of darkened glass that reduces the amount of light reaching the camera lens. Put one on and your videos will improve immeasurably with gorgeous, smooth motion-blurred pans that make a hi-res video so much more appealing.
As a byproduct, ND filters will also reduce the ‘jello effect’; that wobbly look created by the in-flight vibrations that all drones produce. US-based PolarPro produces some of the best DJI-specific ND filters on the market. We’d suggest using one of their ND8 filters for cloudy days and an ND16 or higher for the sunniest times.
If you only edit videos very occasionally, free editing software packages like Windows Movie Maker or Apple’s iMovie will be perfectly adequate for the task in hand. However, if you plan to edit videos on a regular basis and require a powerful program with access to a raft of comprehensive editing facilities, then a paid-for product is undoubtedly the way to go.
There is no shortage of choice when it comes to paid-for software editing packages but bear in mind that some programs are only Windows or Mac compatible while others now charge on the basis of a monthly or annual subscription which can amount to a lot of extra annual outgoings.
Our favourite paid-for products include Apple’s Final Cut Pro X and Adobe Premiere Pro (head to our Adobe Creative Cloud deals page for the best prices on the latter). Both of these easy-to-use post production editing suites will turn any drone footage into something to be truly proud of.