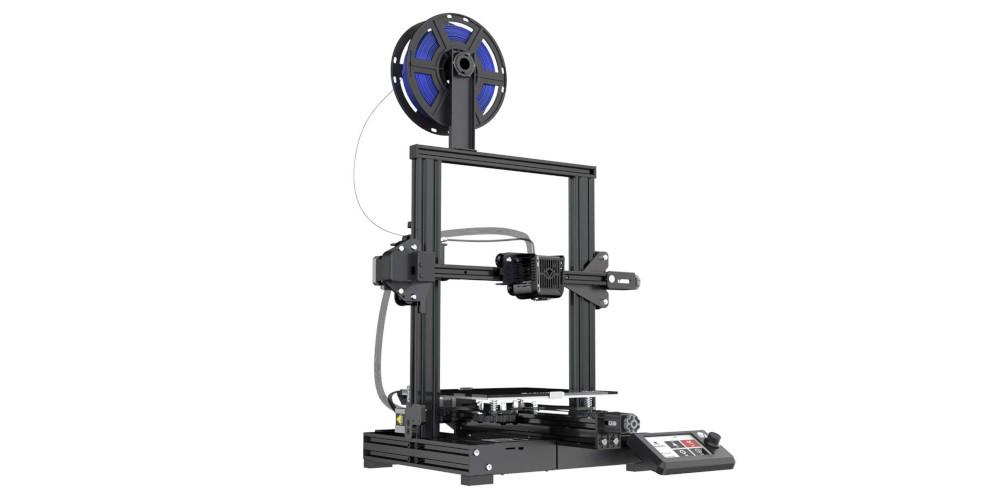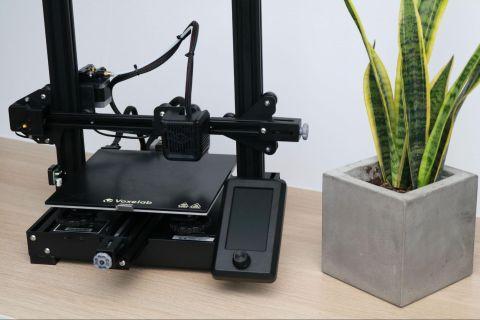
REVIEW – Technology has come a long way in just the past five years. When they first came out, 3D printers were well beyond the price range of most labs not to mention an ordinary citizen. Now anyone with a few hundred dollars to spare can purchase one. The question is always which one to get. The Voxelab Aquila 3D printer is a great first 3D printer for anyone who is looking into getting into the hobby. Easy to assemble and comes with its own custom software to compile 3D files for printing means there isn’t anything needed to start printing beyond the machine itself.
The Voxelab Aquila is a 3D printer perfect for entry level 3D printing hobbyists.
Since the bottom of the printer comes preassembled, the only part that needs to be put together is the z-axis. The instructions were easy to follow and the parts screwed together easily. Be careful when you’re installing the x or z axis bars, you can scratch the frame. I did unfortunately end up scratching my frame while I was trying to screw the bars on. A pro tip for installing the z-axis bars is lay the printer on its side and screw in the side that’s up in the air, not the side that’s laying flat on the table. Also make sure you have a towel or something soft to flip the base onto its side so you don’t damage the base and the table you are working on.
The x-axis rubber belt seems a bit old and turned white when I stretched it to install it. I was a bit worried about it but after my initial worry, it has held up wonderfully and hasn’t stretched or broken. The build was easy, it took me about an hour and a half to build it from start to finish. That’s with having built a 3D printer before but the instructions were super easy to follow so I feel anyone can put the printer together. The English translation is a bit rough but it is easy to follow as long as you have basic knowledge of how things are put together and can use the drawings to clarify the bad translations.
The way the screen attaches to the printer is a little weird. I wasn’t really able to figure out how to get the screen cord fed from the base to the screen. I squished it between the back of the screen and the mounting bracket and it seems to work. I know that there are many different prints available to address this issue, but this review is only going to focus on the out-of-box printer without any additional printable upgrades.

| We've partnered with the world's #1 tech subscription box, Gadget Discovery Club, to offer you an exclusive trial gadget box. Join today to discover epic gadgets you didn't know you needed! Claim your trial box now using the code gadgeteer1 at checkout! |
You do need to know how to level the print bed and the instructions don’t exactly explain how to do it very clearly so I advise looking it up online and watching a tutorial. However, once I leveled the bed, my first print from the machine went really well. It adhered wonderfully to the glass carbon fiber print bed and the quality of the extrusion was nice and clear. There are two ways to import the files for printing, a micro SD card slot and a micro USB port. I used the micro SD card provided to store the files for printing but you can directly connect the printer to your computer using the micro USB port if you wish.
The Voxelab Aquila 3D printer itself is a little loud, but it’s nothing compared to my other printer. The processor fan is the most noisy part, while the motors are almost silent. The extruder fan is the next loudest thing but really quite tolerable if it’s behind a closed door. I found it a bit too loud to sit next to so if you are planning on having it in the same room as you, I’d look into building an enclosure for it.
The screen uses a rotary dial to select things and then press to select. In the lower left corner it shows the printing temperature, bed temperature, print speed and x-axis offset. The currently printing file name is shown above the progress bar along with the printing time and the time remaining to complete the print. The time remaining seems to be pretty inaccurate. In the photo above it shows that it it will take 14 hours and 51 minutes to print but in reality it only took about a hour and 45 minutes.
The print popped off the bed nicely using the provided spatula. Just be careful to not scratch the bed. There was very slight stringing at the beginning and end of the print from the nozzle but nothing that is easily cleaned up during post print.
When I switched to my own filament, I did struggle with bed adhesion. I’m not sure if my filament was a lower quality than the sample filament but I really struggled to keep the print from shifting immediately. I ended up boosting the printing temperature by 20 degrees and the bed temperature by 10 and that seemed to help with the adhesion. I have used painters tape in the past for bed adhesion but I wanted to try to use the printer as straight out of the box as possible.
This little inch and a half robot is a great little test for the printer. It has a large smooth head, print in place joints and small finger and toe details, all things that a quality printer should be able to handle. You can see the slight stringing on the left eye in the photo above.
As you can see in the picture above, it does have some print drooping on the overhangs especially around the hand joint. The finger detail came out nicely for how small they are.
The top of the head is nice and smooth, however you can see where each of the layers overlap each other on the right side behind the ear.
The base shows how the printer prints the first layer. It first prints the outline then fills it in. It also gives you a good view of the ball joints which were printed in place inside the body of the robot. The fact that the printer was able to do this means that it is very accurate printing with very little deviance. If it had a larger deviance, the joints would be printed into the sides of the body and wouldn’t be able to move.
This is a failed print. I was attempting to print a dog head and it broke free from the print bed. It shows what the 3D infill looks like and how the shell of the print is supported without making the print completely solid.
The provided compiling software is simple but gets the job done. Once you load a 3D file, it can be manipulated using the options on the left side.
For prints that have a large overhang, the software can help by adding supports. There are two options for the supports, tree or linear. Above is an example of the tree supports. The supports will snap off in post print and help prevent the print from sagging during printing.
There are two printing modes, simple and expert. The simple mode reduces the available options to prevent confusion and is great for beginners. The expert mode allows the user to adjust nearly any printer setting you wish. All you need to do is save the configuration onto the micro SD card or connect the printer to the computer and start printing.
The Voxelab Aquila is a great entry level 3D printer. Simple and easy to assemble and comes with software specifically designed for it makes it easy for anyone to use it no matter their level of knowledge. As easy as it is for a beginner to use, it has plenty of room for improvements to be made by a more experienced person. This means that this printer is a great option even for those who have more experience with 3D printing. I will definitely be recommending the Voxelab Aquila to anyone I know who is looking into purchasing a 3D printer in the future.
Price: $168Where to buy: Voxelab and FlashforgeSource: The sample for this review was provided by Voxelab